
Installation
This guide covers the deployment of IsoFind on your Windows workstation. The installation is self-contained and requires no server configuration or internet connection.
Requirements
| Component | Minimum required |
|---|---|
| Operating system | Windows 10 64-bit or Windows 11 |
| Processor | x86-64 (Intel or AMD) |
| RAM | 8 GB (16 GB recommended for large databases) |
| Disk space | 1.5 GB for the software + space for your data |
| Permissions | No administrator rights required (user installation) |
Installation Procedure
1. Execution Mode
Run the IsoFind_Setup.exe installer. The first step is to choose the installation scope on your system.
To install the software without elevated administrator rights, choose Install for me only. The software will be placed in your local user directory, which is recommended for shared laboratory workstations.
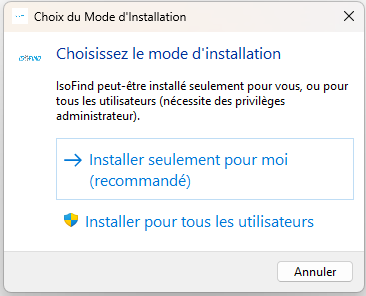 Figure 1: Installation scope selection.
2. Language
Select the installer language. This choice also determines the interface language on first launch. The language can be changed at any time from the software preferences.
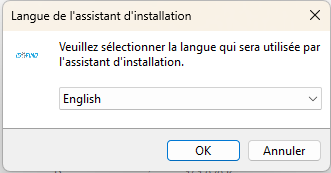 Figure 2: Language configuration.
3. Licence and Destination Directory
After accepting the licence terms, the installer suggests a destination path.
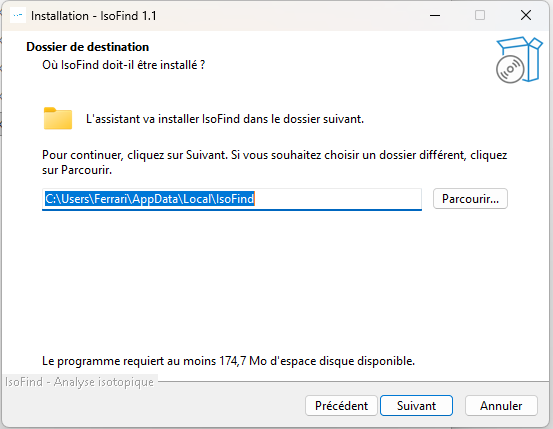 Figure 3: Target directory.
Keeping the default path simplifies automatic updates. A custom path is possible, but will need to be entered manually with each update.
First Launch
Once installation is complete, an IsoFind shortcut is created on the desktop. On first startup, the software automatically initialises your local database, then offers to activate your licence or continue in read-only mode.
Uninstallation
To uninstall IsoFind, use the Windows program manager (Add or remove programs) or run unins000.exe directly from the installation directory.
The wizard asks whether you wish to keep your local databases and exports:
| Choice | Effect |
|---|---|
| YES | .sqlite files, exports and signatures are kept on disk. They will be found intact upon future reinstallation. |
| NO | The entire IsoFind folder is deleted, including projects, databases and lab certificates. This action is permanent and irreversible. |
Before any uninstallation with data deletion, perform a full database backup. See Backup and Restore the Database.